Showing posts with label bathroom. Show all posts

Mirror

Back, back, way back, when my elder son still liked me, he made me a custom bathroom mirror. Well, he didn't actually make the mirror, but he was into glass etching at the time and did his voodoo to a store-bought mirror to customize it for me. I covet this mirror, for obvious reasons.

When we were pulling everything out of the bathroom to prepare it for its makeover, the corner of the mirror broke. Gah!

I was horrified! It was nobody's fault, but there was no way I was going to let this mirror get away with trying to commit suicide!! Since it also had age spots in some places...


...I decided there was no better time to update it with a beautiful frame. Initially I thought I might use the same material as the baseboards, but once I held it up there I decided it was boring. Plus, it was too wide. So off to Lowe's I went, and picked out some groovy molding. Going with the pond/garden theme, I chose this:


I carefully measured and cut the pieces with my miter saw. This was a bit of a challenge to get just right because the mirror didn't sit flush with the wall on the left, and I absolutely HAD to make sure the frame covered the broken bit.

Here's everything dry-fitted together. You can see I already painted the trip white. Then I decided that was boring.

So I took the pieces out back and spray painted everything brushed nickel to match the rest of the hardware installed in that bathroom.


I laid all the pieces upside-down on my kitchen counter. I placed pieces of waxed paper under the joints to protect the counter and shimmed everything level with Popsicle sticks placed diagonally under the corners. Then I gorilla-glued all the joints. I had to holding everything in place with painter's tape and soup cans. It worked great, but like all DIY miters, there were still tiny gaps so I mixed a tiny bit of water into a tiny bit of wood filler and used a tiny paintbrush to finesse the joints. Once everything was dry and perfect, I re-sprayed the joints so now it looks like I knew what I was doing. LOL.

Online tutorials said to clue the frame to the mirror, but this didn't make sense to me. The mirror is fixed to the wall with small metal brackets, preventing the frame from sitting flush with the glass. So I ransacked my sewing kit, cut small pieces of stick-on Velcro, and stuck those on the brackets. Then I used red lipstick to draw a line down the center of each of those, and then held the assembled frame up to all that and pressed lightly. This left a red lipstick mark on the back side of the frame, showing me exactly where to stick the other side of the Velcro strips. Got those stuck on and, voila!


I planned to put a picture hanger thingy on the top-center of the frame and hang it like a picture in front of the mirror, but it doesn't seem this will be necessary. It's been a few hours and the Velcro is holding strong. Woot!

Post Script: Here's a shot from the Lowe's website of the shades I used on my pendant lights. They are actually much more white than this. They look like white fish scales.


Medicine Cabinet redux

As soon as I started to install the lighting, I realized I had screwed up by leaving the medicine cabinet in place. One cannot open it without whacking into the pendants! So I decided I'll do what I wanted to do (but didn't) in the front bathroom.

Before:
Don't get excited about the gray lines around the perimeter.
That's just the light cords I'm holding out of the way.

"Vintage" medicine cabinet removed and donated to Habitat.

Drywall installed to create smooth surfaces.
Mudding begun.

Mudding, sanding, repeat.

Completed and painted.

I planned to install a motion sensitive LED light strip across the top, but when I received what I ordered online it wasn't motion sensitive at all. Then I lost interest.

Bathroom Floor - MULLIGAN!

I didn't like the way it was looking so I started over. It's frustrating, and this will screw up my project schedule, but this is one of the benefits of paper flooring.
No stain in the goo.
After three coats of glue-stain-goo.


Here's what it looks like before sanding:


And here's what it looks like with a quick once-over with a sanding block:


The sanding brings out all the white veins.

So anyway, as I write this I am doing a happy dance (internally; I'm way to tired to do it externally) because I've just put down the first of 10 coats of Polycrylic. Translation: The End Is In Sight, People!!!

Bathroom Floor

With the walls and ceiling completed, it's time to get the flooring done.

Carpet tack strip holes patched, floor cleaned.

One layer of paper applied with glue + stain.

Floor received a light sanding to bring out the veins. Inevitable boo-boos patched.

Second coat of glue/stain.

Third coat of glue/stain.

Painting Complete!


Ready to start on the floor! Yaaaaayyyyy!


Bathroom check-in

The mudding-sanding-mudding-sanding-repeat seemed to go on FOREVAH! Yesterday I was finally ready to throw on a coat of primer.

First I removed all the old, cucky caulk. 


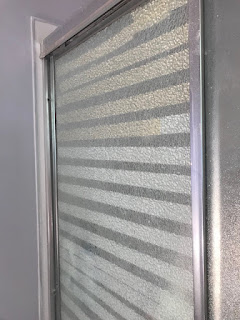
 Oopsie! One of the shower doors didn't appreciate the vibrations.

 
Scraped up all the crumbs and blotches of vinyl adhesive,
and then vacuumed the floors.


And here's the after:


It's finally prime time! 


Primed. 


Yay! Finally ready for the first coat of paint! But wait...just as with the hallway...that first coat of paint let me see all the boo-boos.

"Jebus Cripes, when will it end?"

Yesterday, before dying completely at the end of the day, I re-mudded the icky spots. Today I sanded them...and saw more icky spots. Mudded them, let the mud dry, sanded them...and saw more icky spots. Repeat. The curse of a perfectionist. Finally was able to re-prime and re-paint the repaired areas.

As of this writing, it is now, really and truly, ready for the second and final coat of paint throughout.


Oh, and as for the shower door, I'm effectively delaying its replacement date until I'm damn good and ready by covering one side with masking tape and the other side with two coats of PolyAcrylic.

So there.

Really Excited Jet Ski + Bathroom Update


The mudding - sanding - repeat process takes a goodly amount of time. The 4th coat of mud was applied just yesterday and I simultaneously made a decision about the door.

The previous door opened INTO the bathroom, which is already about the size of a phone booth. I originally thought I would replace it with a pocket door, but while installing the additional outlet I was able to see inside the wall that would house the door while open. In my opinion, there were too many studs and electrical connections in there. I didn't feel like moving all that so I've decided to use a mirrored barn door.

Demolition of door frame:


 The ultimate goal:


I will only need to buy the hardware, as any of these will be easy for me to make. Full length mirrors on both sides will provide the illusion of expansion as well as dressing glass.

Bathroom...continued...

Day Five (after ? days break)

 Patch and seal where tiles were removed.


 Mud to bring patch level with the rest.

 Walls sanded.

 First coat of mud applied as far up as I can reach.

Steve has volunteered to be on the hook for the upper mudding 
and the sanding that has to happen between each coat of mud.

Bathroom...continued...

DAY FOUR

Looks like there was half a tree in there after all.

Accent tiles had to be removed.
These were placed there years ago to cover up where water had made the drywall mushy.


Ready for mud.