I've been taking my time with this (as with everything else in life - heh), and had an evening off during a sister-visit, so I thought I'd make a new post on where this project is at this point.
On one section of the counter, we had some mishaps. The cat stepped on it while it was still wet and sticky, Steve tried to pick her up quickly, and she dug her claws in. That left a few tiny holes. So I went over that with some new paper. But when I opened the brew to paint it on, I stirred it with the paint brush and it loosened a bunch of stain that had settled at the bottom of the container. Like a dummy, I went ahead and painted it on. It was much darker. So I patched again, lather rinse repeat, and it just got worse and worse.
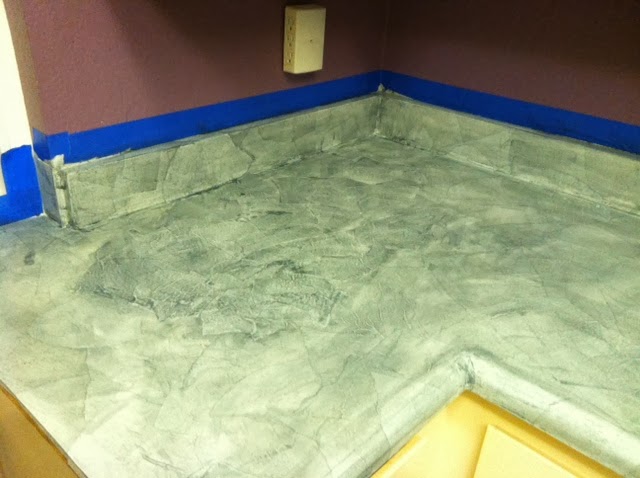
When you mess up...
Last night I decided the whole section warranted a mulligan. I spent about 45 minutes ripping, crunching and smoothing out a new batch of paper, then about an hour (or less) applying the new paper right over the old mess. This time I was more careful not to slop, to catch all the drips, and to smoosh the bumps out with my finger while the paper was still wet and pliable.
...you just put on a new layer!
Looks much better, donut? This morning I painted on another layer of brew, and I'll continue to do that at intervals today until it matches the surrounding counter.
Admitted weirdness in this photo. Taking these at night, under the stupid fluorescent lights (which are a whole nuther future project), makes the cabinets look really yellow. They're not. They're actually a color that's like a little bit of coffee in a lot of milk. I used my El Cheapo photo editor to adjust the photo for more accurate representation, and now it looks like the whole kitchen hovers over nothingness. Don't walk in there! You'll fall to China!
Aaaanyway, before applying the Polycrylic, I want to take the counters down a few more shades. Not too dark, but darker than what you see here. I'll keep posting, natch.