I veered off topic from the bathroom a bit over this past week. One day I spent about 7 hours helping a friend whose house was slated for demolition the following day. He wanted to save a few items for the granny house he intends to build, and he had a bunch of glass blocks I wanted for myself. It was back-breaking work, but we salvaged the blocks, two bathroom vanities, all the good interior doors, several cabinets (kitchen and laundry room), and some of the window treatments. We worked so late that he had to pull cars around and shine headlights through the windows. There was a lot more I wish we could have salvaged, since we both hate seeing good things end up in the landfill, but we had a very small window of time so we did the best we could.
I came away with 24 beautiful, fully intact glass blocks that I'm thinking of using when I renovate my shower. The plan would be to put them in the wall facing the backyard, bringing in a lot of light!
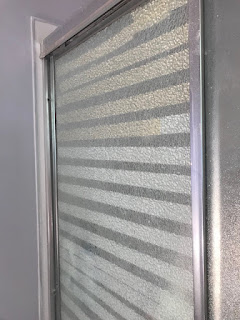
Day-before-yesterday I helped another friend. She and her husband own a rental house they've been renovating for the past few weeks. Well, now the renters are moving in and they can't use the kitchen sink, the stove, nor the front bathroom shower! While her husband worked on the sink, I tore out the shower doors and their bent frame, removed all the old, yucky caulk, cleaned everything with alcohol, then installed the new fame, doors and caulk.
Once again I failed to take a "before" shot, but afterward everything was beautiful. Very clean and fresh. I had never installed one of these before, so this was great practice for when I'm ready to do my own!
Bathroom Floor - MULLIGAN!
I didn't like the way it was looking so I started over. It's frustrating, and this will screw up my project schedule, but this is one of the benefits of paper flooring.
No stain in the goo.
After three coats of glue-stain-goo.
The sanding brings out all the white veins.
So anyway, as I write this I am doing a happy dance (internally; I'm way to tired to do it externally) because I've just put down the first of 10 coats of Polycrylic. Translation: The End Is In Sight, People!!!
Bathroom Floor
With the walls and ceiling completed, it's time to get the flooring done.
Carpet tack strip holes patched, floor cleaned.
One layer of paper applied with glue + stain.
Floor received a light sanding to bring out the veins. Inevitable boo-boos patched.
Second coat of glue/stain.
Third coat of glue/stain.
Blood Orange
Yesterday, thanks to my ever-helpful roommate-step-daughter, Lydia, who is much stronger than I am, my dwarf Moro blood orange tree found its new home in the garden.
Couldn't have done it without you, Lyd!
Bathroom check-in
The mudding-sanding-mudding-sanding-repeat seemed to go on FOREVAH! Yesterday I was finally ready to throw on a coat of primer.
Yay! Finally ready for the first coat of paint! But wait...just as with the hallway...that first coat of paint let me see all the boo-boos.
Yesterday, before dying completely at the end of the day, I re-mudded the icky spots. Today I sanded them...and saw more icky spots. Mudded them, let the mud dry, sanded them...and saw more icky spots. Repeat. The curse of a perfectionist. Finally was able to re-prime and re-paint the repaired areas.
As of this writing, it is now, really and truly, ready for the second and final coat of paint throughout.
Oh, and as for the shower door, I'm effectively delaying its replacement date until I'm damn good and ready by covering one side with masking tape and the other side with two coats of PolyAcrylic.
First I removed all the old, cucky caulk.
Oopsie! One of the shower doors didn't appreciate the vibrations.
Scraped up all the crumbs and blotches of vinyl adhesive,
and then vacuumed the floors.
And here's the after:
It's finally prime time!
Primed.
Yay! Finally ready for the first coat of paint! But wait...just as with the hallway...that first coat of paint let me see all the boo-boos.
"Jebus Cripes, when will it end?"
Yesterday, before dying completely at the end of the day, I re-mudded the icky spots. Today I sanded them...and saw more icky spots. Mudded them, let the mud dry, sanded them...and saw more icky spots. Repeat. The curse of a perfectionist. Finally was able to re-prime and re-paint the repaired areas.
As of this writing, it is now, really and truly, ready for the second and final coat of paint throughout.
Oh, and as for the shower door, I'm effectively delaying its replacement date until I'm damn good and ready by covering one side with masking tape and the other side with two coats of PolyAcrylic.
So there.
I'm Fancy Now
Old cutting board. Stained and gross. Came with the house, so 36 years old.
New cutting board!
Thank you, Corbin!!!
Really Excited Jet Ski + Bathroom Update
The mudding - sanding - repeat process takes a goodly amount of time. The 4th coat of mud was applied just yesterday and I simultaneously made a decision about the door.
The previous door opened INTO the bathroom, which is already about the size of a phone booth. I originally thought I would replace it with a pocket door, but while installing the additional outlet I was able to see inside the wall that would house the door while open. In my opinion, there were too many studs and electrical connections in there. I didn't feel like moving all that so I've decided to use a mirrored barn door.
Demolition of door frame:
I will only need to buy the hardware, as any of these will be easy for me to make. Full length mirrors on both sides will provide the illusion of expansion as well as dressing glass.
Bathroom...continued...
Day Five (after ? days break)

Patch and seal where tiles were removed.
Mud to bring patch level with the rest.
Walls sanded.
First coat of mud applied as far up as I can reach.
Steve has volunteered to be on the hook for the upper mudding
and the sanding that has to happen between each coat of mud.
Subscribe to:
Posts (Atom)


