Showing posts with label hallway. Show all posts

Baseboards...

...are in.
Refinishing of the dining table has begun.
My goal here is to get it back to as like-new condition as possible so I can sell it. The stupid thing is a nagging reminder of how much of the family refuses to sit at my table. I'm going to rid myself of this behemoth and get something smaller, more practical, and easier to dust!

Hall update

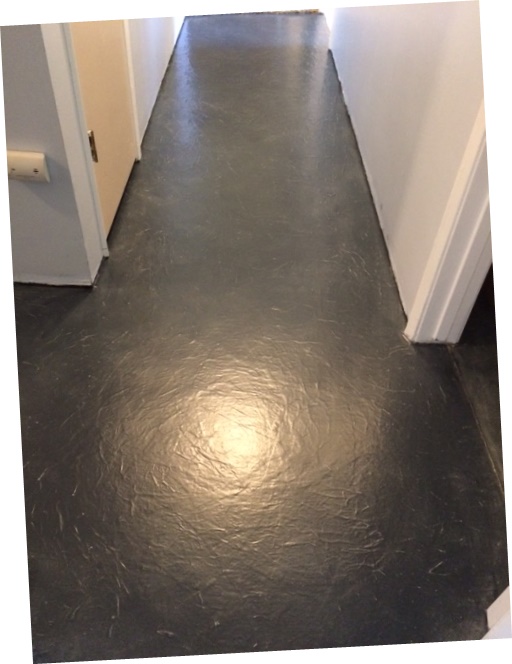
Huzzah! The floor, it be finished! I applied the final coat of Polycrylic yesterday afternoon.

It looks nothing like marble, but at this point I couldn't care less. 
I don't even care that this picture is crooked.

Now all that's left is to buy baseboard material and get that installed, and then buy something out of which I will create thresholds at each doorway.

I looked at marble thresholds today but they are too think and would be a tripping hazard. I'm thinking something very, very thin. I might go with pieces of laminate flooring in which case I'd have to cut off the tongue/groove nonsense and then paper and poly them to match the floor. Maybe I can find similar material that doesn't have the tongue and groove nonsense. 

In any case, as I said: Huzzah!

Hall update

OK, let's see…

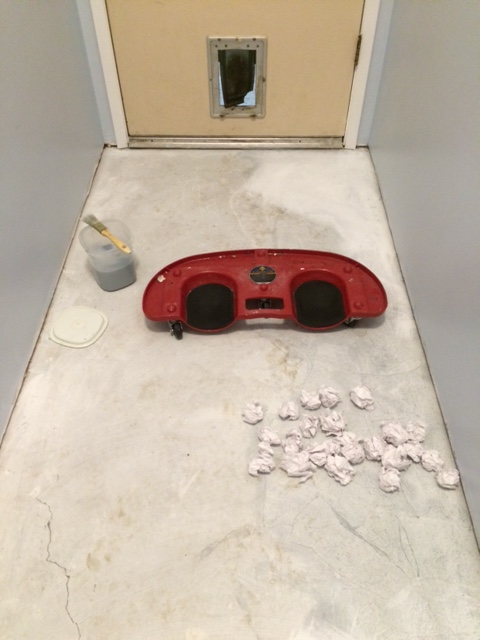
This phase of the project started several weeks ago, before everything got real dirty. I used concrete patch stuff to...wait for it...patch the concrete. Only where the carpet tack strips left holes; no need to patch cracks or anything before papering.

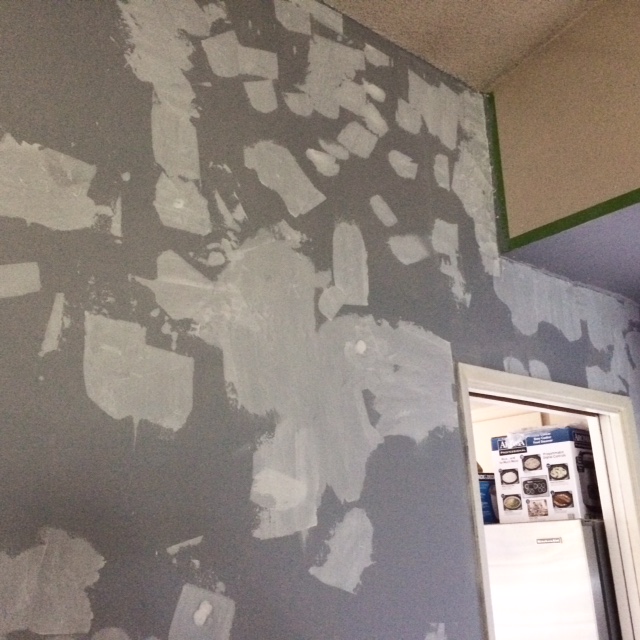
As you can see, this was before we mudded over the old paint and texture.

This past week I started the second phase: faux flooring. The first day I papered as much of the hallway as I could before my body gave me the finger. I had completed about two thirds of the hall at that point, and this was done with stain in the glue goo.

 Let the papering begin!

I thought I was very clever to paper the length of the hallway first down one side and then down the other. With at least one side dry at any given time, we would retain access the bedrooms and bathrooms. When I went back the next day to paper the bare side, however, I discovered that the dry paper on the first side absorbed too much stain on my second pass. This created a dark "trail" down the center of the hallway.

 Unacceptable.

At that point I decided my best course of action would be to cover that all up with a fresh layer of paper using glue goo with no stain. Just glue and water.

It took two layers to cover the darkness.

This worked great, but now I would need to repaper the entire frigging hall. Best to start with the whole catastrophe matching, I figured. So I did. The whole hall. With two layers. That took another couple of days. (Remember - I'm feeble.)

Then I mulled things over for a few days.

My brain was focused on achieving a marble-like finish, but I wasn't sure I'd be able to accomplish that. I watched a YouTube video on creating a faux marble finish on furniture and figured the floor inside the hall pantry would be a great place to test this out.

I gave it one layer of glue goo with the stain mixed in, then took a fine art brush and added full-strength stain at some of the paper seams. Once that was dry, I added another layer of glue goo + stain over the top of that. It turned out looking like crap.

An artist, I am not.

The pantry floor will be getting a mulligan at some point.

So aaaaanyway, after carefully vacuuming and then getting on my hands and knees with a damp washcloth to scrub off all the cat and dog footprints (storm, remember?), I started painting on the goo (with stain).

Here's the hall with one coat. 
It's looking pretty good, imo, but needs to dry completely 
each time before I decide if I want it darker.

2 coats

3 coats

4th coat of stain with lots more stain in the goo!

I'm probably going to apply just one more coat before transitioning to the poly finish, but I wanted to get this published. It's been sitting in my drafts for the past couple of weeks as I do the work and add the photos.

More to come...

Follow-up on door trim

I previously showed how I cracked the bejesus out of the trim around the kitchen door, and I promised to post another photo to demonstrate my killer wood putty skillz once it was all repaired and painted.

*deep curtsy

Let the papering begin!

UPS brought my ginormous roll of butcher paper yesterday! Let the papering begin!


Moving right along...

I had previously purchased three six-panel doors at a deep discount from Habitat Restore. They are the right size for the three bedrooms. Corbin came and installed two of them.


In the near future I will buy matching doors for the hall bathroom and the hall pantry.

All door trim is now installed, painted and caulked, but that adventure was not without its setbacks. When I pulled the paint tape off, this happened.

Apologies for the crappy photography.


And this is how much paint I had left.

But I managed.

Next up is the floor. Not wishing to drive across town to buy the pure-white butcher paper that I used in the bathroom and kitchen (hey, it was cold and rainy outside!), I thought I'd give it a go with the inexpensive "packing paper" in stock at my local Failmart. The paper has a slight brown tinge to it and, after application, it looks rather like concrete. Or like the cat peed there again.

 Cue the jokes about installing a "faux concrete" floor over real concrete.

Then, just for shits and giggles, I tested another small area using some silver wrapping paper I had on hand.

Ugly.

This last test area was done with the remaining scraps of white butcher paper I had in the garage.

Test with butcher paper.

I'm obviously most happy with this last one. IMO, it comes the closest to looking like Carrara marble, which is my goal.
Real Carrara marble.

I may actually go back over it when all is said and done, and do a little marble faux painting on the seams. The goal will be to keep the expanses clean and whiter while highlighting the seams so they look more like the veins in real marble.

So, since that last test used my last scraps of butcher paper, I went a-shopping for more. Ended up ordering it from Amazon, which buys me approximately one week to recover from all the crouching, crawling and scootching I've been doing!

The devil is in the details

The walls are done. They have to be done. For the last coat of paint, I purchased another gallon of the ice blue and then toned it down a little at home by mixing in a wee bit o' gray. I love the new toned-down color, but knowing it would be difficult to recreate I had to call the painting quits (stop obsessing about tiny imperfections) when I ran out.

The different is indiscernible in the photo, I'm sure.

Next step is to finish up the door casings. I've painted one coat of white-white-white on those that remained in place; they need a second coat. I've purchased enough new casing material to replace the pieces that had to be removed to accomplish the remudding and repainting. But before I paint them, I needed to tame imperfections on the reveals.

Gunky door casings                           I love my MultiMax!                             Pretty in paint

Fast forward -- I finished painting/repainting all door casings. I was all excited to remove the paint tape...and then this happened.

FML


This is what happens when you think you're finished but then you remember you are a perfectionist

I just couldn't let the imperfections on this wall slide. there were bumpy areas by the door moulding and other small indents and bumps on the rest of the wall. Truth be told, the whole hallway probably would have benefited from a FOURTH mud coat and sanding.

Pilgrim's Progress (which was surely slow since they didn't have cars back then)

I've spent the past couple of weeks using wood putty and sandpaper to nurse the existing trim boards around the doors and cupboards in the hallway back into some semblance of non-shittiness. There were four we just HAD to remove because the tiny bit of wall space around them would have just been too difficult to work on, but I didn't want to replace more trim than absolutely necessary. So I've ever-so-slowly been re-molding the moulding.

At one point, I encountered a nail that had worked its way out. I tenderly tapped it back in with a hammer and the trim board suddenly split from the floor to about 10 inches up. After evening rumination, I decided I could fix that too. Sorry I didn't take a before pic, but the after shows that

I can build an entire perfect house from wood putty! 

I'll post another after it's painted. Hopefully the repair will be invisible.

Having completed that, and all the sanding to follow, and all the wipe-down and vacuuming following that, I spent two days applying the primer. It had to be split into two days because of all the up-and-down on the ladder. My stupid broken body just couldn't complete the job in one day but eventually it got done. Then...

Thanks to the primer, I could then see every spot that was still sub-par. Try as I might to accept mediocrity, I just can't. As it turns out, Steve admitted he did THREE coats of mud in his "little room" whereas I only had TWO coats on the hall before priming. Yesterday I mixed up a new batch of mud and went after it again.


Makin' Messes - It's What I Do

Tyvek-type fabric was used to protect the (dismantled) light fixtures from the mess. I didn't want to completely remove them because we'll need the light to work in this dark space.


The sky continued to fall. (It didn't really take that long at all; I just wanted to give credit where credit was due.)


Afterward it looked like a bird had pooped down the front of the linen cupboard.
 

The chair rail is now gone. The hallway was the only placed in the house with chair rail, and why? No one puts chairs in the hallway.


Popcorn was everywhere!!!


Bailey was somewhat flummoxed.


Since two of the doors that open to the hall have already been refinished, and since we discovered what a mess happened in the linen cupboard when we started this work without protecting it, we decided to wrap that cupboard and the two finished doors before proceeding. Brilliant.


So now the ball is in Steve's court. He will start sanding, mudding, sanding, mudding and sanding the ceiling and walls. I won't start the floor until that's all done and painted but I have at least one and maybe two volunteers to help with the papering. Which is vastly appreciated since my feeb self breaks for 3 days if I spend longer than about 15 minutes crouched on the ground.

The Sky is Falling

In response to Kashi's advancing age and related incontinence, we have extracted all the pee-soaked carpet and padding from our hallway.


Also gone are the baseboards and chair rail.


The master bedroom will be next, but not until we update the hall as we have the bathroom and Steve's (sarcastically named) "sewing room." This means removing the outdated, dirty and ugly popcorn ceilings first.


You'll have to stay tuned to see what comes next!!